Header Logo
  • English
    • Spanish
  • Marketing Challenges
    • Strategy Challenges
      • More Leads
      • Better Leads
      • Lower Lead Cost
      • Faster Cycle
      • Customer Expansion
    • General Challenges
      • Integrations
      • Automate Processes
    • Better Data and Utilization
  • Our Solutions
    • Marketo Implementation
    • CRM Integration
    • Marketo Audit
    • Consultancy Services
    • Marketo Training
    • Data and Reporting
    • Flowsteps.io
  • Marketo
  • Academy
    • Webinars
    • Blog
    • Guides
  • About Us
    • Careers
  • Contact Us
  • Request Demo
Academy | Blog post

How to Create an Effective Preference Center in Marketo: A Step-by-Step Guide

20 January, 2025

|

Alba Fernández

|

Estimated 3 minutes read

Overview

A well-designed preference center in Marketo can significantly enhance user experience, reduce subscription cancellations, and provide valuable insights for better segmentation.
In this article, we’ll explore what a preference center is, why your company might need one, how to set it up with a detailed step-by-step guide, and the best practices to optimize it.

  • 1. What is a Preference Center?
  • 2. Key Benefits
  • 3. How to Set Up a Preference Center in Marketo: Step-by-Step
  • 4. Recommendations and Best Practices
  • 5. Conclusion

What is a Preference Center?

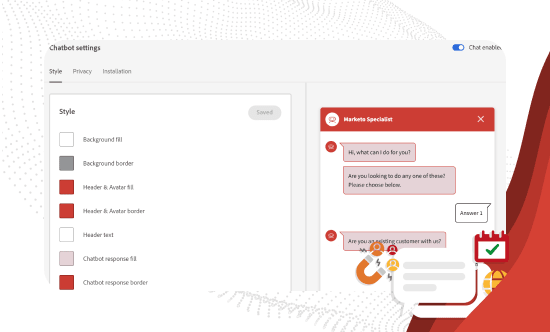
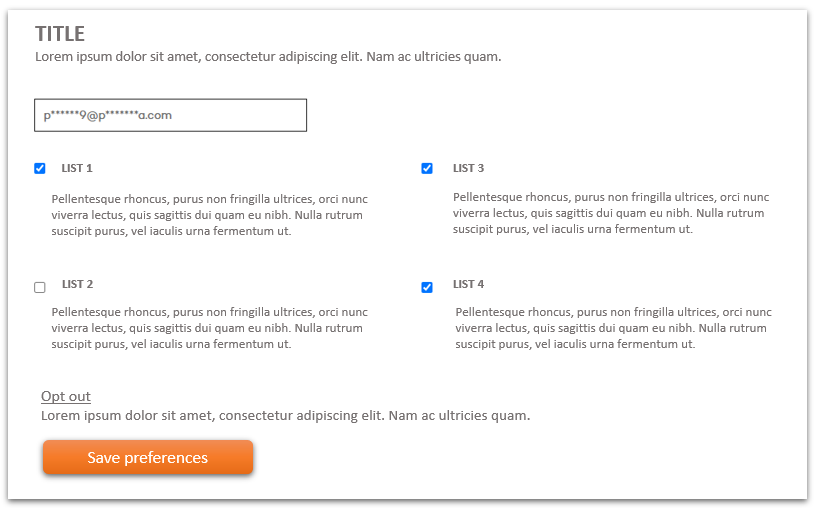
A preference center is a landing page where users can select how they wish to interact with your brand. This may include:

  • Choosing the types of communication they want to receive (newsletters, promotions, updates).
  • Selecting preferred communication channels (email, SMS, push notifications, etc.).
  • Specifying topics or business lines of interest.
  • Advanced options like temporary suspensions or geographic location preferences.
  • Updating personal information such as name, phone number, email, etc.

Key Benefits

  • Reduced Subscription Cancellations: Users can adjust their preferences instead of unsubscribing entirely.
  • Personalization: Segment users more effectively to send more relevant messages.
  • Regulatory Compliance: Meet regulations like GDPR by offering clear subscription options.

How to Set Up a Preference Center in Marketo: Step-by-Step

1. Conduct a Discovery Session
Before you begin, it’s essential to understand the customer’s needs and business context:

  • Initial Audit: Review current communication types, channels used (email, SMS, push), and monthly interaction volumes.
  • Resource Gathering: Ensure you have brand style guides, landing page examples, and graphic materials.
  • Define Key Fields: Identify critical information for segmentation, such as language, country, or areas of interest.

2. Create Custom Fields
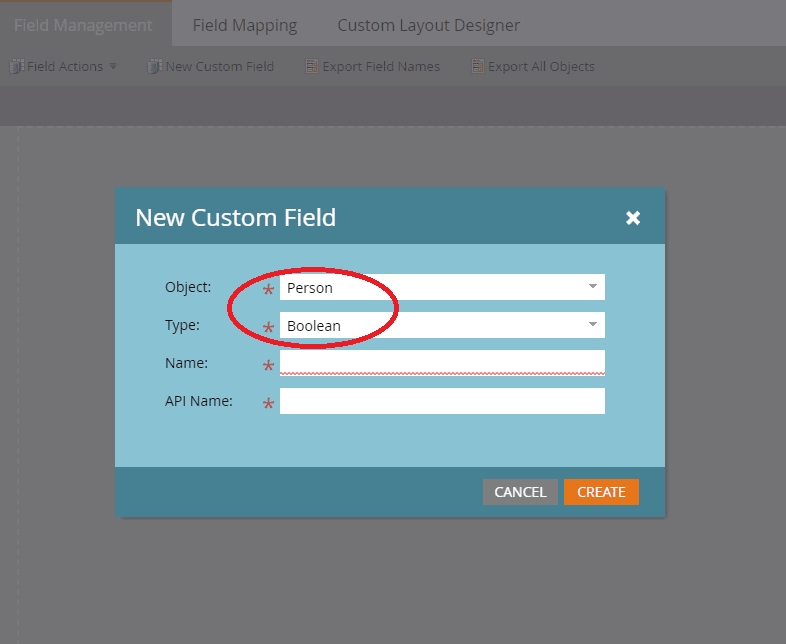
In Marketo’s admin panel:
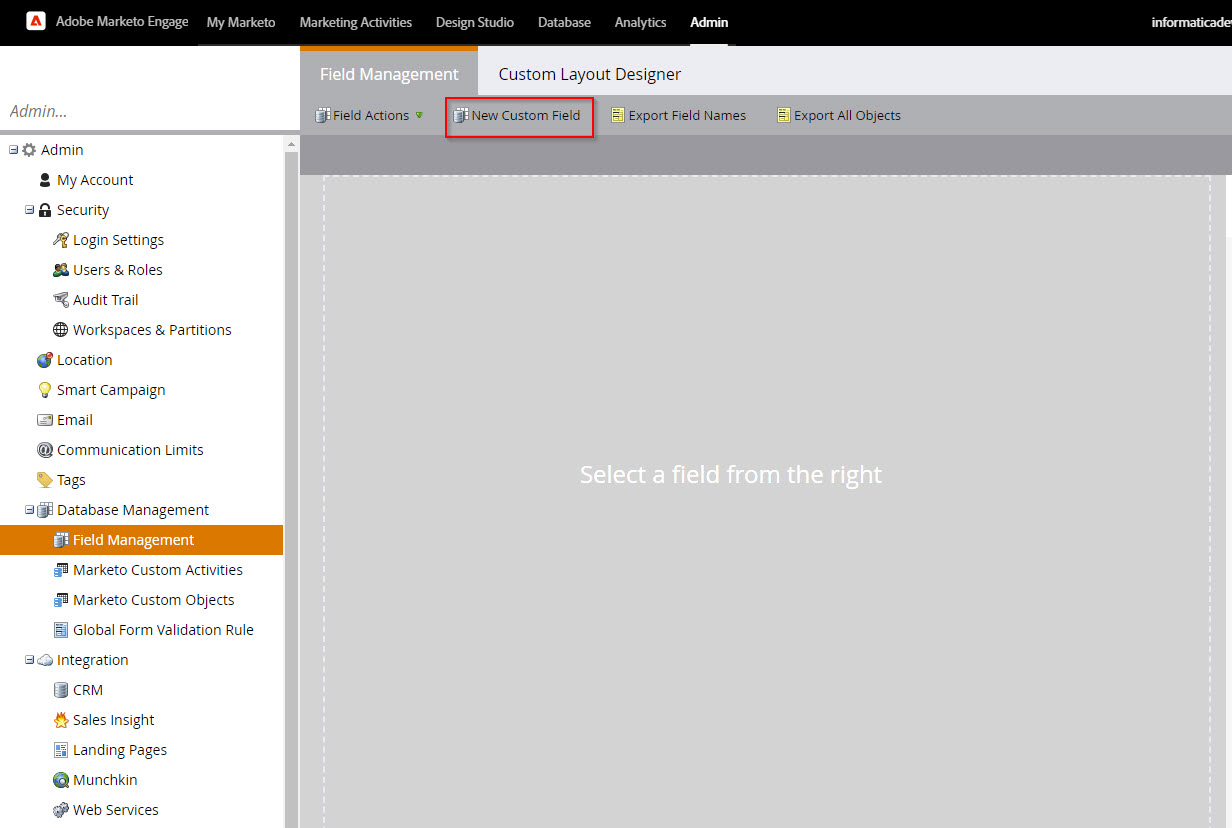
  1. Go to Database Management > Field Management > New Custom Field
    .
  2. Create specific fields for communication preferences, following the naming convention established in your Marketo instance. Examples:
    • AX PC Email Communications
    • AX PC Business Area
    • AX PC Country
  3. Define each field as boolean, list, or checkbox as needed to standardize inputs.

3. Design the Form
Using the Design Studio, create a functional form:

  • Include custom fields: Add options like business areas, communication types, and country.
  • Hide the email field: Set it as hidden with {{lead.Email Address}} to automatically recognize the user.

  • Group fields by categories: Use “fieldsets” to organize sections such as:
    • Communication Channels
    • Business Areas or Topics
    • Language

4. Configure the Landing Page
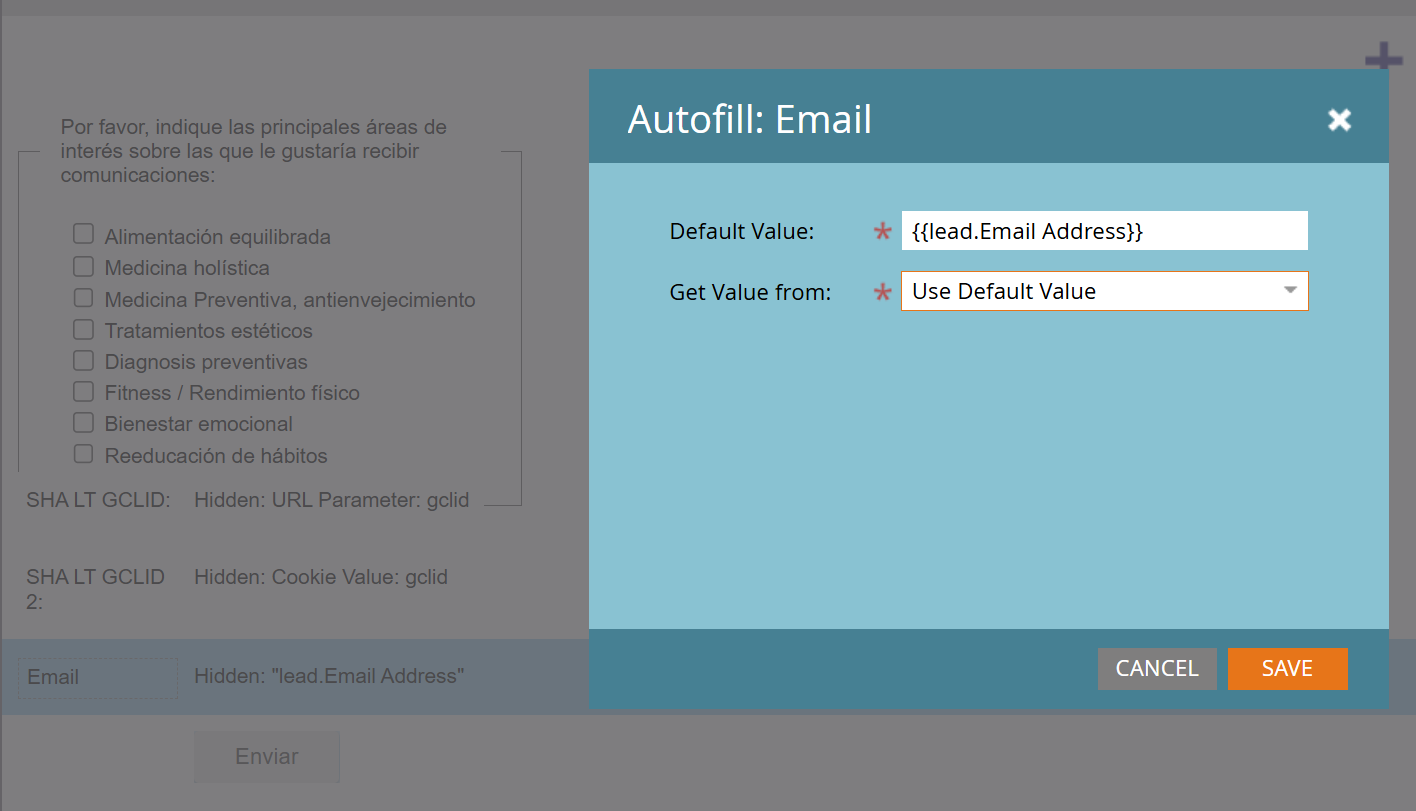
Ensure the design reflects your brand’s visual identity:

  • Use a mock-up to validate the design with the client before implementation.
  • Implement scripts in Google Tag Manager for advanced functionalities like:
    • Displaying the form only if the user originates from a valid email.
    • Unchecking all options if “Unsubscribe from all” is selected.

5. Create an Operational Program in Marketo to Manage Campaigns
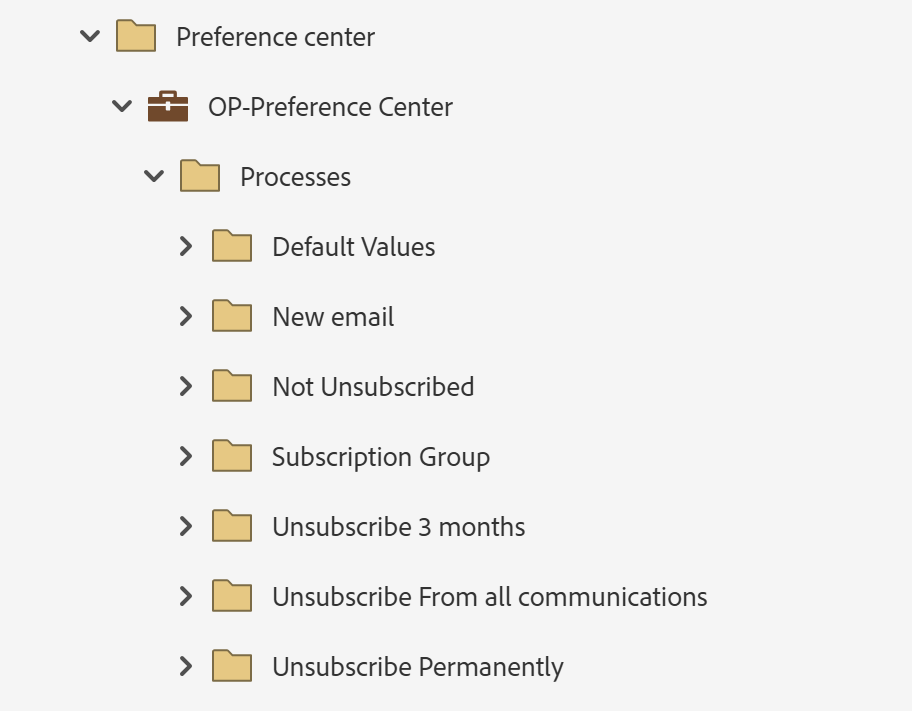
Set up campaigns in Marketo to manage preferences:

  1. Updating Existing Users: Ensure current values reflect the new preferences.
  2. Managing New Subscriptions: Configure triggers to set default values for new users.
  3. Handling Re-subscriptions and Cancellations: Update data in real-time as preferences change.

6. Perform Comprehensive Testing
Before launching the preference center, thoroughly test all possible scenarios:

  • Ensure fields and buttons work correctly.
  • Test in a secure environment with various email addresses.
  • Simulate typical scenarios, such as updating preferences or unsubscribing.

Recommendations and Best Practices

  1. Offer Clear Options and a User-Friendly Design:
    • Make categories intuitive and ensure the page design is simple and clear.
  2. Communicate the Benefits:
    • Include text explaining how adjusting preferences will enhance the user experience.
  3. Maintain Flexibility:
    • Consider including temporary subscription options for users who prefer pauses over unsubscribing. This improves unsubscribe rates.
  4. Advanced Segmentation:
    • Use preferences by business area or country to create more targeted audiences in Marketo, enabling personalized campaigns.
  5. Monitor Results:
    • Use Marketo reports to assess the preference center’s impact on key metrics like open and click rates. Adjust periodically, especially in the first months after implementation.
  6. Implement Conditional Visibility for Better UX:
    • Use scripts in Google Tag Manager to hide the preference form when users access the page without coming from an email. This ensures the form functions only when the user’s email is recognized by Marketo, preventing errors and enhancing the user experience.

Conclusion

Implementing a preference center in Marketo can enhance both customer experience and the effectiveness of your marketing strategies. Following a structured approach and adopting best practices ensures it is functional, attractive, and aligned with your audience’s needs. Personalizing preferences by topics and location can take your segmentation efforts to the next level.

SIGN UP FOR OUR NEWSLETTER

Alba Fernández

Marketing Automation Consultant at Kapturall

Alba transitioned from a background in business financials and accounting to the exciting world of Marketing Automation as a Consultant. As a two-time Marketo Certified Expert, she possesses a deep understanding of leveraging technology to optimize marketing strategies. Her experience working with clients across various industries enriched her professional journey, providing valuable insights and adaptability.

See LinkedIn Profile

Related Content

Image 1
Unlocking the Power of Marketo Executable Campaigns

Executable Campaigns enhance control in Marketo by ensuring completion before the next step, enabling better lead processing.

Continue reading
26 April, 2024
Image 1
Hyper Personalization with Marketo & OpenAI

Continue reading
16 August, 2023

Previous Article
Back to Blog
Next Article

Kapturall Logo

Marketing, Technology and Data to create meaningful relationships that generate Sales.

Legal Statement   |   Privacy Policy   |   Cookies Policy   |   Diversity Policy

Office - +34 919 61 84 59

© 2025 Kapturall Solutions S.L. - All Rights Reserved

Social Media Logo 1 Social Media Logo 2 Social Media Logo 3