With this flow action, you can dispatch tailored prompts to Google Bard’s Completion endpoint via your Marketo smart campaign, instantly receiving and archiving responses in a designated Marketo person record field.
This dynamic feature paves the way for automated, intelligent categorization, ultra-personalized communication, and myriad other applications. It empowers you to hone your marketing tactics and bolster your campaign results. Leveraging Google Bard’s advanced AI capabilities ensures your customers get top-notch, individually-tailored responses.
After installation, merely drag Google Bard’s flow action into your Marketo smart campaign flow and set your prompts for specific inquiries or personalized notifications. The corresponding replies will circle back to your Marketo platform, directly saving in a person record field of your preference. The subsequent potential applications are vast.
Google Bard’s flow action for Adobe Marketo Engage emerges as the ultimate tool for enterprises wishing to harness AI’s might for smart categorization, enhanced messaging personalization, and beyond. Experience it now and elevate your marketing automation game!
![]()
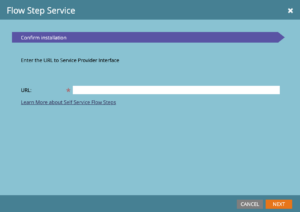
To install Kapturall’s Google Bard Flow Action service in Marketo, you’ll need to enter the installation URL, which is https://actions.kapturall.com/swagger/bard, in the Service Providers menu of your Admin Section.
https://actions.kapturall.com/swagger/bard

Make sure you have Admin permissions in Marketo, as custom flow step installation requires these permissions.
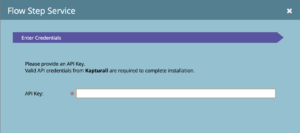
Once you’ve entered the URL, click “Next” to proceed to the Enter Service Credentials section.

The only outgoing field is the Bard Prompt field. This is where the prompt will be stored. We recommend using a textarea type field to allow for prompts up to 2000 characters. This field should be updated before calling the Google Bard flow action
Any field where you want to receive and store the response from Google Bard needs to be first setup in the inbound mapping. This can also be updated in the future. Be sure to select fields with the format and character limit that matches the expected output of your prompt.
We recommend also creating a text area field with the api name bardResponse which will be the default field for returning the response.
After initial onboarding, you can always edit the service details as needed by accessing the service detail screen from the Service Providers grid.
Once installed you will see the Send Bard Prompt flow action available in your smart campaigns.
You will see 4 fields on the flow action:
This is the field where the flow step will store the response from Google Bard. This should be the API name of the field, and it will need to be added and enabled in Admin > Service Providers > Send Bard Prompt. The response will always be sent back to the field bardResponse if it has been created and enabled.
This is a number from 1-100. Higher values like 80 will make the output more random, while lower values like 20 will make it more focused and deterministic.
Add any additional information you want the model to know about when creating the response. This will be sent to the model with the prompt.